Dagger 0.13: First-class Monorepo Support, Private Modules, a New CLI Command, and More

Today we are introducing version 0.13 of the Dagger Engine. In this release we focused on three very common user requests: better support for monorepos; support for modules hosted on private Git servers; and calling the core API from the command-line.
We’re continuing to improve performance and usability - adding TypeScript SDK optimization and a backward compatibility checker, bringing significant performance boosts to those using TypeScript and reducing the time and risk for both module developers and module users when upgrading their Dagger Engines.
First-class monorepo support
Using Dagger in a monorepo is now faster and more convenient, thanks to two improvements: context directory access, and pre-call filtering.
Context directory access
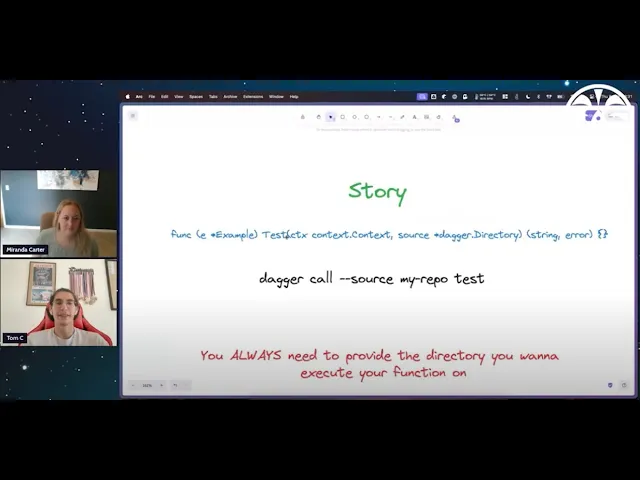
Dagger Functions can now access any files in the directory or Git repository their module is loaded from (also known as their “context”).
This makes the experience of calling a Dagger Function nicer for end users, because they don’t have to explicitly pass every input directory as an argument. It also makes modules more self-contained, and easier to split up.
For example instead of this:
dagger call build –frontend=./frontend –backend=./src/app/backend –build-config=./tools/build/config/latestUser might instead call this:
dagger call buildThis allows for a powerful new pattern: each logical component in your monorepo can get its own Dagger module, which cleanly encapsulates both the data and pipeline logic necessary to build, test and deploy it. Now each component can share its capabilities with other components in a standard way, regardless of the underlying stack. You can even use dependencies between Dagger modules to model the dependencies between your components.
This is a powerful pattern which opens many possibilities. For example, Dagger can now be used as a general-purpose packaging and distribution system:
Want to run a dev environment with the Dagger Engine built from source, ready to use? Try this command:
dagger call -m github.com/dagger/dagger dev terminalWant to run a local instance of the Dagger documentation for a given pull request? Try this:
dagger call -m github.com/dagger/dagger@pull/8087/head docs server as-service upTo learn more, see the documentation.
Pre-call filtering
Dagger Functions filter the contents of directories they receive as arguments. Crucially, these filters are applied before the function is called. This leads to massive performance gains in monorepos, for two reasons:
- Optimized uploads. Uploading local files into the Dagger Engine is a common performance bottleneck. Pre-call filtering allows the engine to only upload the files your function needs. The more files in your repository, the more drastic the speedup.
- Better caching. Pre-call filtering means pre-cache filtering: local files that are not needed by your function, will not invalidate its cache if they change.
Thanks to context directory access and pre-call filtering, it is now realistic to use Dagger even in very large monorepos. If you want to see how we at Dagger are adopting these features in our own monorepo, you can follow our progress here: https://github.com/dagger/dagger/pull/8284
Examples
Both features - context directory and pre-call filtering - are used by annotating arguments to your function. Here is an example:
Golang
func (m *Example) Example(
  // +defaultPath="/"
  // +ignore=[“.git”, “*.env”, “.github”]
  repo *dagger.Directory,

  // +defaultPath="."
  moduleDir *dagger.Directory,

  // +defaultPath=”/README.md”
  readme *dagger.File
) (...) {...}
Typescript
@func()
 async example(
   @argument({ defaultPath: "/", ignore: [“.git”, “*.env”, “.github”] }) repo: Directory,
   @argument({ defaultPath: "." }) moduleDir: Directory,
   @argument({ defaultPath: “/README.md”}) readme: File,
 ): any {...}
Python
  @function
  async def example(
      self,
      repo: Annotated[dagger.Directory, DefaultPath("/"), Ignore([“.git”, “*.env”, “.github”])],
      moduleDir: Annotated[dagger.Directory, DefaultPath(".")],
      readmeFile: Annotated[dagger.File, DefaultPath("/README.md")]
  ) :
To learn more, see the documentation.
Private modules
Dagger can now load modules from private Git servers. This makes it easier for engineering teams to embrace Dagger for cross-team collaboration in proprietary or sensitive codebases.
Key benefits:
- Access to private modules: Developers can now reference and use modules stored in private repositories
- Enhanced security: Leverages SSH’s robust authentication mechanism
- Flexibility: Compatible with major Git hosting platforms like GitHub, GitLab, and BitBucket
Dagger modules can now be referenced using two new URL styles:
- SCP-like syntax:
git@gitserver:username/repo.git[/subdir][@version] - Explicit SSH:
ssh://git@gitserver/username/repo.git[/subdir][@version]
This implementation uses your system’s SSH agent, mounting the socket specified by the SSH_AUTH_SOCK environment variable to the Dagger engine. This approach ensures that your existing SSH keys and configurations are respected, maintaining a secure and familiar workflow.
For developers and teams:
- Simplifies integration of private, custom modules into Dagger pipelines
- Enables modular and reusable code patterns across private repositories
- Facilitates collaboration on proprietary tools and workflows
To get started, ensure your SSH keys are properly set up and added to your SSH agent. Then, simply use the SSH ref scheme when referencing your modules in Dagger:
dagger call -m ssh://git@gitserver/your-org/private-module.git@versionTo learn more, see the documentation.
New CLI command: dagger core
The Dagger CLI has a new command: dagger core. It lets you call the Dagger Core API directly from the CLI.
Dagger’s core types (Container, Directory, File, etc) are very powerful, but couldn’t be called directly from the CLI… until now! Using dagger core, you can now call the core API directly without having to write any code. This is great for experimentation, prototyping and debugging.
It works the same as dagger call, the only difference is there’s no flag to load a module:
dagger call -m: Execute a function from a Moduledagger core: Execute a function from the core API
To see which functions are available, run the following:
dagger core --helpThe list of available Functions shown, correspond to what you’d use in code with dag. For example these are the same:
- Go:
dag.Container() - Python:
dag.container() - TypeScript:
dag.container() - CLI:
dagger core container
Let’s see a few usage examples.
Pull a container image and inspect its contents:
dagger core container from --address=alpine file --path=/etc/os-release contents
NAME="Alpine Linux"
ID=alpine
VERSION_ID=3.20.2
PRETTY_NAME="Alpine Linux v3.20"
HOME_URL="https://alpinelinux.org/"
BUG_REPORT_URL="https://gitlab.alpinelinux.org/alpine/aports/-/issues"
Run an ephemeral container with an interactive terminal:
dagger core container from --address=alpine terminal
dagger / $
Pull a Git repository and list all its contents:
dagger core git --url https://github.com/dagger/dagger branch --name=main tree glob --pattern='**'Try it out and let us know what you think.
Keep in mind:
- dagger core commands can run anywhere in the host because it doesn’t load any module
- Not all core Functions are available because they may have a complex Function argument that is not supported by the CLI yet
- Some core Functions can be useful only in debugging scenarios
- Dagger functions are used for listing Functions in user modules (using the -m flag), so it doesn’t list core API Functions
For more details, take a look at the PR: 6947
Reliability and performance improvements
Backward Compatibility Checker
We are introducing “compatcheck”, a tool that helps you ensure your Dagger modules are backwards compatible. Of course, this tool is itself a Dagger module! We initially built this module for our own use, and decided to release it when we realized it could be useful to the community.
This module is particularly useful when upgrading Dagger, or when building modules that need to be compatible across different environments or engine versions.
The compatcheck module works by comparing the schema of any provided remote module between two different versions of the Dagger engine. For example, to compare a hello world module between v0.12.0 and v0.13.0:
$ dagger call -m github.com/dagger/dagger/modules/compatcheck run --module github.com/shykes/daggerverse/hello --version-a v0.12.0 --version-b v0.13.0Our goal is to ensure that any daggerverse-published module won’t change schemas in a backwards incompatible way (since module compatibility introduced in v0.12.0 should emulate previous engine versions), but this module can be a helpful tool to help ensure this for users who are particularly interested in long-term stability.
For more details, take a look at the module in the daggerverse.
Improved Python workflow
Now that Astral released uv 0.3.0, with production-ready support for end-to-end project management (and more), we’ve decided to switch the use of the lower level requirements.lock to install a Python module’s dependencies, to the new uv.lock.
This is a long time coming, and makes uv the best tool today for Python packaging! The new default will make the workflow for developing a Python Dagger Module much simpler.
The only pre-requisite (apart from having the dagger CLI), is to have uv installed. It’s a single binary that doesn’t depend on Python, can replace several tools today (pip, pip-tools, pipx, poetry, pyenv, virtualenv and more), and is very fast to run.
Here’s an example for creating a new Python Module, and opening the NeoVim editor with autocompletions fully working:
dagger init --sdk=python my-module
cd my-module
uv run vim
That’s it! On dagger init, Dagger creates a uv.lock file, and hooks the dagger-io dependency to the local ./sdk directory. In turn, uv run:
- Downloads an appropriate Python version, if necessary
- Creates the virtual environment (in
.venv) - Installs all dependencies
- Opens
vimwith the virtual environment activated
VSCode users can run uv run code. from the terminal, or open one from inside the IDE and type:
uv syncAssuming the newly created .venv is at the root of the VSCode workspace, it should pick up autocompletions automatically.
It runs pretty fast too. Depending on Internet connection and other factors, and with an existing Python but empty uv cache, it takes onlyjust about 1 second!
To know more about project management with uv see Working on Projects from their documentation website. Also make sure to read Astral’s uv: Unified Python packaging blog post for more on what uv can do for Python users.
For more details see the PR here: 8311
More reliable OpenTelemetry implementation
The telemetry pipeline that feeds the TUI and Cloud has been re-implemented to be less error-prone. Previously telemetry data was routed to clients “on the fly” and streaming would complete when all observed spans for that client completed. This could result in hangs in obtuse scenarios - mostly exercised by our own test suite - and generally was incredibly complicated and brittle to maintain. Now data is persisted temporarily in the engine for each client, thus publishing is decoupled from subscribing, allowing subscribers to simply read all the telemetry data until all the clients disconnect.
For more details, see the PR: 7996
TypeScript SDK performance improvements (optimized caching)
Transforming your CI into a bullet train journey is our top priority. In this release we saw an opportunity to improve TypeScript via improved caching:
We refactored the runtime to cache more operations, specifically when you only update the code so you can increase the feedback loop when developing your Dagger module. We also re-enable package manager cache with a stronger namespace system to save your node_modules into cache volume.
Sources are now mounted at the very last step, to allow more operations, such as dependency downloading, to be cached more easily.
Several other enhancements made to the TypeScript runtime:
- Configure the TS runtime to use your favorite package manager by setting the
packageManagerfield in your package.json (https://github.com/dagger/dagger/pull/7864) - Configure the version of your runtime with the
dagger.runtimefield in your package.json (https://github.com/dagger/dagger/pull/7852) - The TS runtime now generates lockfiles to keep track of your dependencies and improve initialization time.
For more details, see the PR: 8236
Additional improvements
We also made many small reliability and performance improvements, each of which is probably not worth noting, but collectively should be quite noticeable.
What’s Next?
Thanks to our amazing community of Daggernauts, we are drinking from a firehose of feedback, bug reports and feature requests. As a result we are busier than ever developing the next wave of improvements to Dagger. By the way, we are looking for a Senior Software Engineer to join our team!
If you have requests or feedback, or want to contribute, don’t hesitate to join our Discord server and say hello. And starring our GitHub repository is always appreciated!
Thank you for your support, we look forward to Daggerizing many more pipelines with you!
The Dagger team